
[React] onChange & onClick
2022.11.29
💡 React State & Props
📌 onChange
<input> <textarea> <select>
위와 같은 Form엘리먼트는 사용자의 입력값을 제어하는데 사용된다. React에서는 이러한 변경될 수 있는 입력값을 일반적으로 컴포넌트의 State로 관리하고 업데이트한다.
function NameForm() {
  const [name, setName] = useState("");

  const handleChange = (e) => {
    setName(e.target.value);
  }

  return (
    <div>
      <input type="text" value={name} onChange={handleChange}></input>
      <h1>{name}</h1>
    </div>
  )
};
onChange 이벤트가 발생하면 e.target.value를 통해 이벤트 객체에 담겨있는 input 값을 읽어올 수 있다. onChange는 input의 텍스트가 바뀔 때마다 발생하는 이벤트이며 이벤트가 발생하면 handleChange 함수가 작동한다.
이벤트 객체에 담긴 input값을 setState를 통해 새로운 state로 갱신한다.
👨🏻💻 select
📌 onClick
onClick 이벤트는 말 그대로 사용자가 클릭이라는 행동을 하였을 때 발생하는 이벤트이다.
function NameForm() {
  const [name, setName] = useState("");

  const handleChange = (e) => {
    setName(e.target.value);
  }

  return (
    <div>
      <input type="text" value={name} onChange={handleChange}></input>
      <button onClick={alert(name)}>Button</button>
      <h1>{name}</h1>
    </div>
  );
};
onClick 이벤트에 alert(name) 함수를 바로 호출하면 컴포넌트가 렌더릴 될 때 함수 자체가 아닌 함수 호출의 결과가 onClick에 적용된다. 때문에 버튼을 클릭할 때가 아닌, 컴포넌트가 렌더링 될 때에 alert 가 실행되고 따라서 그 결과인 undefined (함수는 리턴 값이 없을 때 undefined 를 반환한다.) 가 onClick 에 적용되어 클릭했을 때 아무런 결과도 일어나지 않는다. 따라서 **onClick **이벤트에 함수를 전달할 때는 함수를 호출하는 것이 아니라 아래와 같이 리턴문 안에서 함수를 정의하거나 리턴문 외부에서 함수를 정의 후 이벤트에 함수 자체를 전달해야 한다.
// 함수 정의하기

return (
  <div>
	...
    <button onClick={() => alert(name)}>Button</button>
	...
  </div>
  );
};

// 함수 자체를 전달하기

const handleClick = () => {
  alert(name);
};

return (
  <div>
      ...
    <button onClick={handleClick}>Button</button>
      ...
  </div>
  );
};
🧐 종합실습
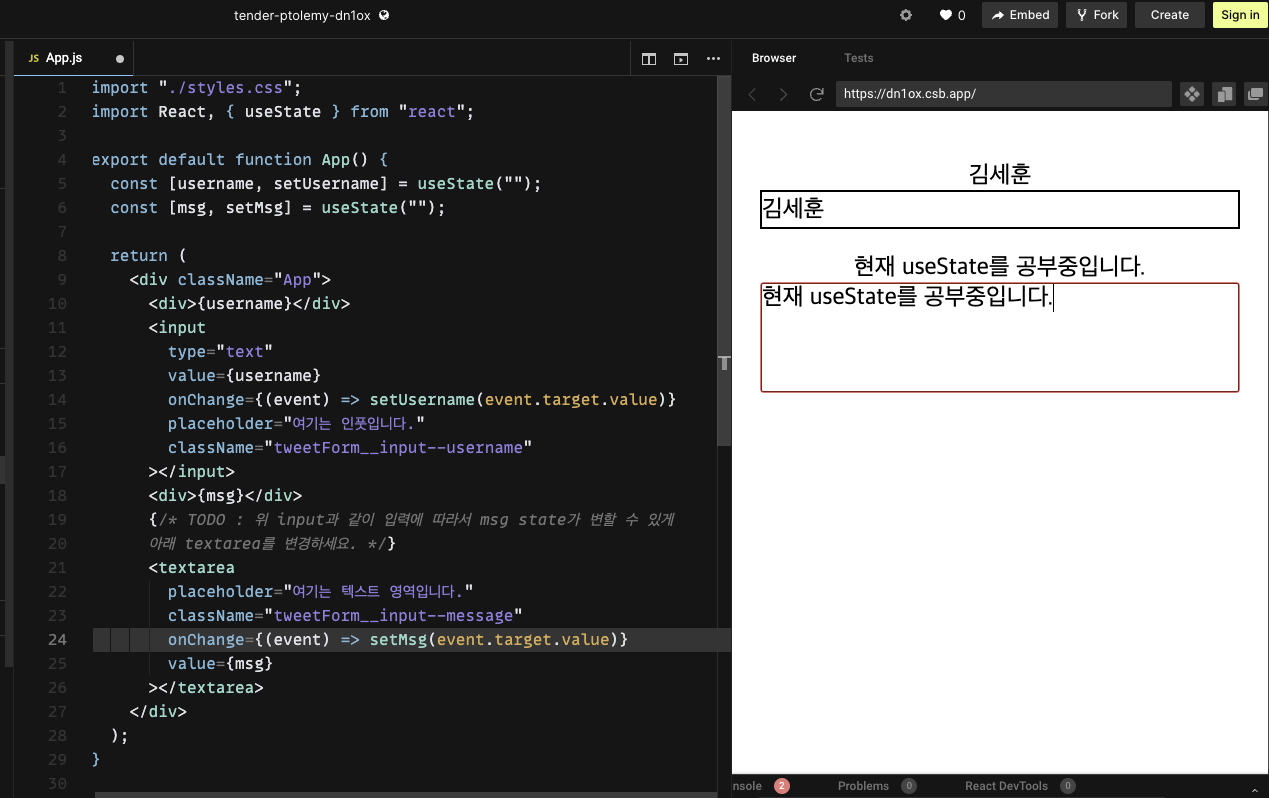
// TODO : useState를 react로 부터 import 합니다.
import React, { useState } from 'react';
import Footer from '../Footer';
import Tweet from '../Components/Tweet';
import './Tweets.css';
import dummyTweets from '../static/dummyData';

const Tweets = () => {
  // TODO : 새로 트윗을 작성하고 전송할 수 있게 useState를 적절히 활용하세요.
  const [userName, setUserName] = useState('parkhacker')
  const [userText, setUserText] = useState('')
  const [buttonData, setbuttonData] = useState(dummyTweets)

  const handleButtonClick = (event) => {
    const tweet = {
        id: buttonData.length+1,
        username: 'kimcoding',
        picture: `https://randomuser.me/api/portraits/women/${getRandomNumber(
          1,
          98
        )}.jpg`,
        content: userText,
        createdAt: new Date(),
        updatedAt: new Date(),
    };
    // TODO : Tweet button 엘리먼트 클릭시 작동하는 함수를 완성하세요.
    // 트윗 전송이 가능하게 작성해야 합니다.
    // dummydata와 일치해야한다.
    setbuttonData([...buttonData, tweet])
  };

  const handleChangeUser = (event) => {
    // TODO : Tweet input 엘리먼트에 입력 시 작동하는 함수를 완성하세요.
    setUserName(event.target.value)
  };

  const handleChangeMsg = (event) => {
    // TODO : Tweet textarea 엘리먼트에 입력 시 작동하는 함수를 완성하세요.
    setUserText(event.target.value)
  };

  return (
    <React.Fragment>
      <div className="tweetForm__container">
        <div className="tweetForm__wrapper">
          <div className="tweetForm__profile">
            <img src="https://randomuser.me/api/portraits/men/98.jpg" />
          </div>
          <div className="tweetForm__inputContainer">
            <div className="tweetForm__inputWrapper">
              <div className="tweetForm__input">
                <input
                  type="text"
                  defaultValue="parkhacker"
                  placeholder="your username here.."
                  className="tweetForm__input--username"
                  onChange={handleChangeUser}
                  value={userName}
                ></input>
                <textarea
                className='tweetForm__input--message'
                onChange={handleChangeMsg}
                value={userText}
                placeholder="Your Text here.."></textarea>
              </div>
              <div className="tweetForm__count" role="status">
                <span className="tweetForm__count__text">
                  {/* TODO : 트윗 총 개수를 보여줄 수 있는 Counter를 작성하세요. */}
                  {'total: '+ buttonData.length}
                </span>
              </div>
            </div>
            <div className="tweetForm__submit">
              <div className="tweetForm__submitIcon"></div>
              {/* TODO : 작성한 트윗을 전송할 수 있는 button 엘리먼트를 작성하세요. */}
              <button
              className='tweetForm__submitButton'
              onClick={handleButtonClick}>Tweet</button>
            </div>
          </div>
        </div>
      </div>
      <div className="tweet__selectUser"></div>
      <ul className="tweets">
        {/* TODO : 하나의 트윗이 아니라, 주어진 트윗 목록(dummyTweets) 갯수에 맞게 보여줘야 합니다. */}
       {newTweet.map((el) =>  <Tweet tweet={el} />)  }
      </ul>
      <Footer />
    </React.Fragment>
  );
};

export default Tweets;
Comments