
[Helfit] 게시판 CRUD 게시글 작성 & 조회
2023.03.20(월)
회원 유저 관리를 모두 완료하고 게시판 CRUD작업으로 넘어왔다
유저관리는 리덕스 툴킷과 react-useContext를 사용해서 전역에서 관리하려 하였으나 새로고침을 하게되면 값이 날아가서 사용하기 무척 어려웠다. 분명 다른 방법이 있겠지만 프로젝트 남은 기간이 부족하기 때문에 로컬스토리지에 저장하고 게시판 작업으로 넘어갔다.
이전 프리때와 다른점은 확실히 진행이 빠르다는 점이다. 지난 프리때는 2주라는 기간 동안 로그인/회원가입 유저관리에 쩔쩔매고있었는데 이번에는 일주일도 안되서 모두 해결했다. 전역에서 유저정보를 관리하는 리덕스와 useContext때문에 시간을 많이 허비한 것을 생각하더라도 시간이 매우 많이 단축되었다.
프리때 게시판 작업을 많이 돕긴했지만 내가 직접한 것이 아니라서 굉장히 걱정이 많았다.
지금까지 작업한건 게시글 작성과 조회이다.
💡 게시글 작성

이 페이지를 작성하면서 react-quill때문에 고생을 많이했다.. 지금도 계속 조금씩 에러를 발생시키는중.. 여기서 가장 힘들었던 점은 카테고리, 테그 부분이였다. 카테고리 쪽은 별도로 semantic-ui-react를 사용했는데 다루기 정…말 까다로웠다…
axios쪽은 사진을 다른 api로 전송해야 된다는 점에서 조금 해맸던 것 같다. (4.01 수정) 우리팀은 백엔드 팀에서 file을 별도로 저장하는 DB가 있어서 file쪽으로 사진을 보내고 res의 boardImageUrl을 보내는 식으로 사진을 보내야했다.. 지금 생각해도 조금 복잡한 구조인 것 같다.
...
// 먼저 options로 각 갤러리별 key와 value(백엔드에서 주는)를 설정했다.
const options: Option[] = [
  { key: 'health', text: '헬스 갤러리', value: '1' },
  { key: 'crossfit', text: '크로스핏 갤러리', value: '2' },
  { key: 'pilates', text: '필라테스 갤러리', value: '4' },
  { key: 'oww', text: '오운완 갤러리', value: '5' },
  { key: 'diet', text: '식단 갤러리', value: '6' }
];
...
const handlePostButtonClick = () => {
    const titleError = validateTitle(title);
    const userID = JSON.parse(localStorage.UserInfo).userId;

    if (titleError) {
      setTitleError(titleError);
      return;
    }

    const accessToken = localStorage.accessToken;

    if ((category === '5' || category === '6') && !selectedFile) {
      alert('오운완 갤러리와 식단 갤러리는 사진 업로드가 필수 입니다.');
      return;
    }

    if (selectedFile) {
      const formData = new FormData();
      formData.append('multipartFile', selectedFile);
      return axios
        .post(`${URL}/api/v1/file/upload`, formData, {
          headers: {
            'content-type': 'multipart/form-data',
            Authorization: `Bearer ${accessToken}`
          }
        })
        .then((res) => {
          const boardImageUrl = res.data.body.resource;
          axios
            .post(
              `${URL}/api/v1/board/${category}/${userID}`,
              {
                title: title,
                text: editorInput,
                boardTags: tags,
                boardImageUrl: boardImageUrl
              },
              {
                headers: {
                  Authorization: `Bearer ${accessToken}`
                }
              }
            )
            .then(() => router.push('/community'))
            .catch((err) => {
              alert('올바른 요청이 아닙니다.');
              console.log(err);
            });
        })
        .catch((err) => {
          alert('올바른 요청이 아닙니다.');
          console.log(err);
        });
    }

    axios
      .post(
        `${URL}/api/v1/board/${category}/${userID}`,
        {
          title: title,
          text: editorInput,
          boardTags: tags
        },
        {
          headers: {
            Authorization: `Bearer ${accessToken}`
          }
        }
      )
      .then(() => alert('게시글 등록이 성공적으로 이루어졌습니다.'))
      .then(() => router.push('/community'))
      .catch((err) => {
        alert('올바른 요청이 아닙니다.');
        console.log(err);
      });
  };
🚨 유효성 검사
담긴 데이터를 보내는 방법이나 유효성을 검사하는 방법은 멘토님께서 추천해주신 react-hook-form을 사용해봤는데 정말 편하게 구현했다.
....
				{/* 카테고리 */}

        <div className={style.category}>
          <div className={style.titleMessage}>
            <div className={style.Text}>카테고리</div>
            <div className={style.Subtext}>
              카테고리는 반드시 설정해주어야 합니다.
            </div>
          </div>
          <DropdownC options={options} onChange={handleDropdownChange} />
        </div>

        {/* 테그 */}

        <div className={style.tag}>
          <div className={style.titleMessage}>
            <div className={style.Text}>태그</div>
            <div className={style.Subtext}>
              태그는 최대 5개까지 추가할 수 있습니다.
            </div>
          </div>
          <Tag onTagAdd={handleTagAdd} />
        </div>

        {/* 제목 */}

        <div className={style.title}>
          <div className={style.titleMessage}>
            <div className={style.Text}>제목</div>
            <div
              className={style.Subtext}
              style=
            >
              {titleError || '제목은 반드시 입력해야 합니다.'}
            </div>
          </div>
          <div className={style.TitleInput}>
            <input
              type='text'
              placeholder='Write your Title...'
              className={style.TitleInput}
              value={title}
              onChange={handleTitleInputChange}
              onBlur={() => setTitleError(validateTitle(title))}
            />
          </div>
        </div>

        {/* 사진첨부 */}

        <div>
          <div className={style.title}>
            <div className={style.titleMessage}>
              <div className={style.Text}>사진</div>
              <div className={style.Subtext}>
                오운완 갤러리와 식단 갤러리는 사진 선택이 필수입니다.
              </div>
            </div>
          </div>
          <div className={style.line}>
            <div className={style.picture}>
              <input
                type='file'
                accept='image/*'
                id='fileInput'
                onChange={handleFileInputChange}
                style=
              />
              <label htmlFor='fileInput' className={style.label}>
                사진 선택
              </label>
              <div className={style.FileName}>
                <p className={style.FileNameOver}>{fileName}</p>
              </div>
            </div>
            ....
게시글 작성에서 내가 원했던 것
- 태그는 5개만 가능할 것 ✅
- 오운완, 식단 갤러리는 사진을 필수로 첨부할 것 ✅ -> 이유는 아래 게시글 조회에서 확인
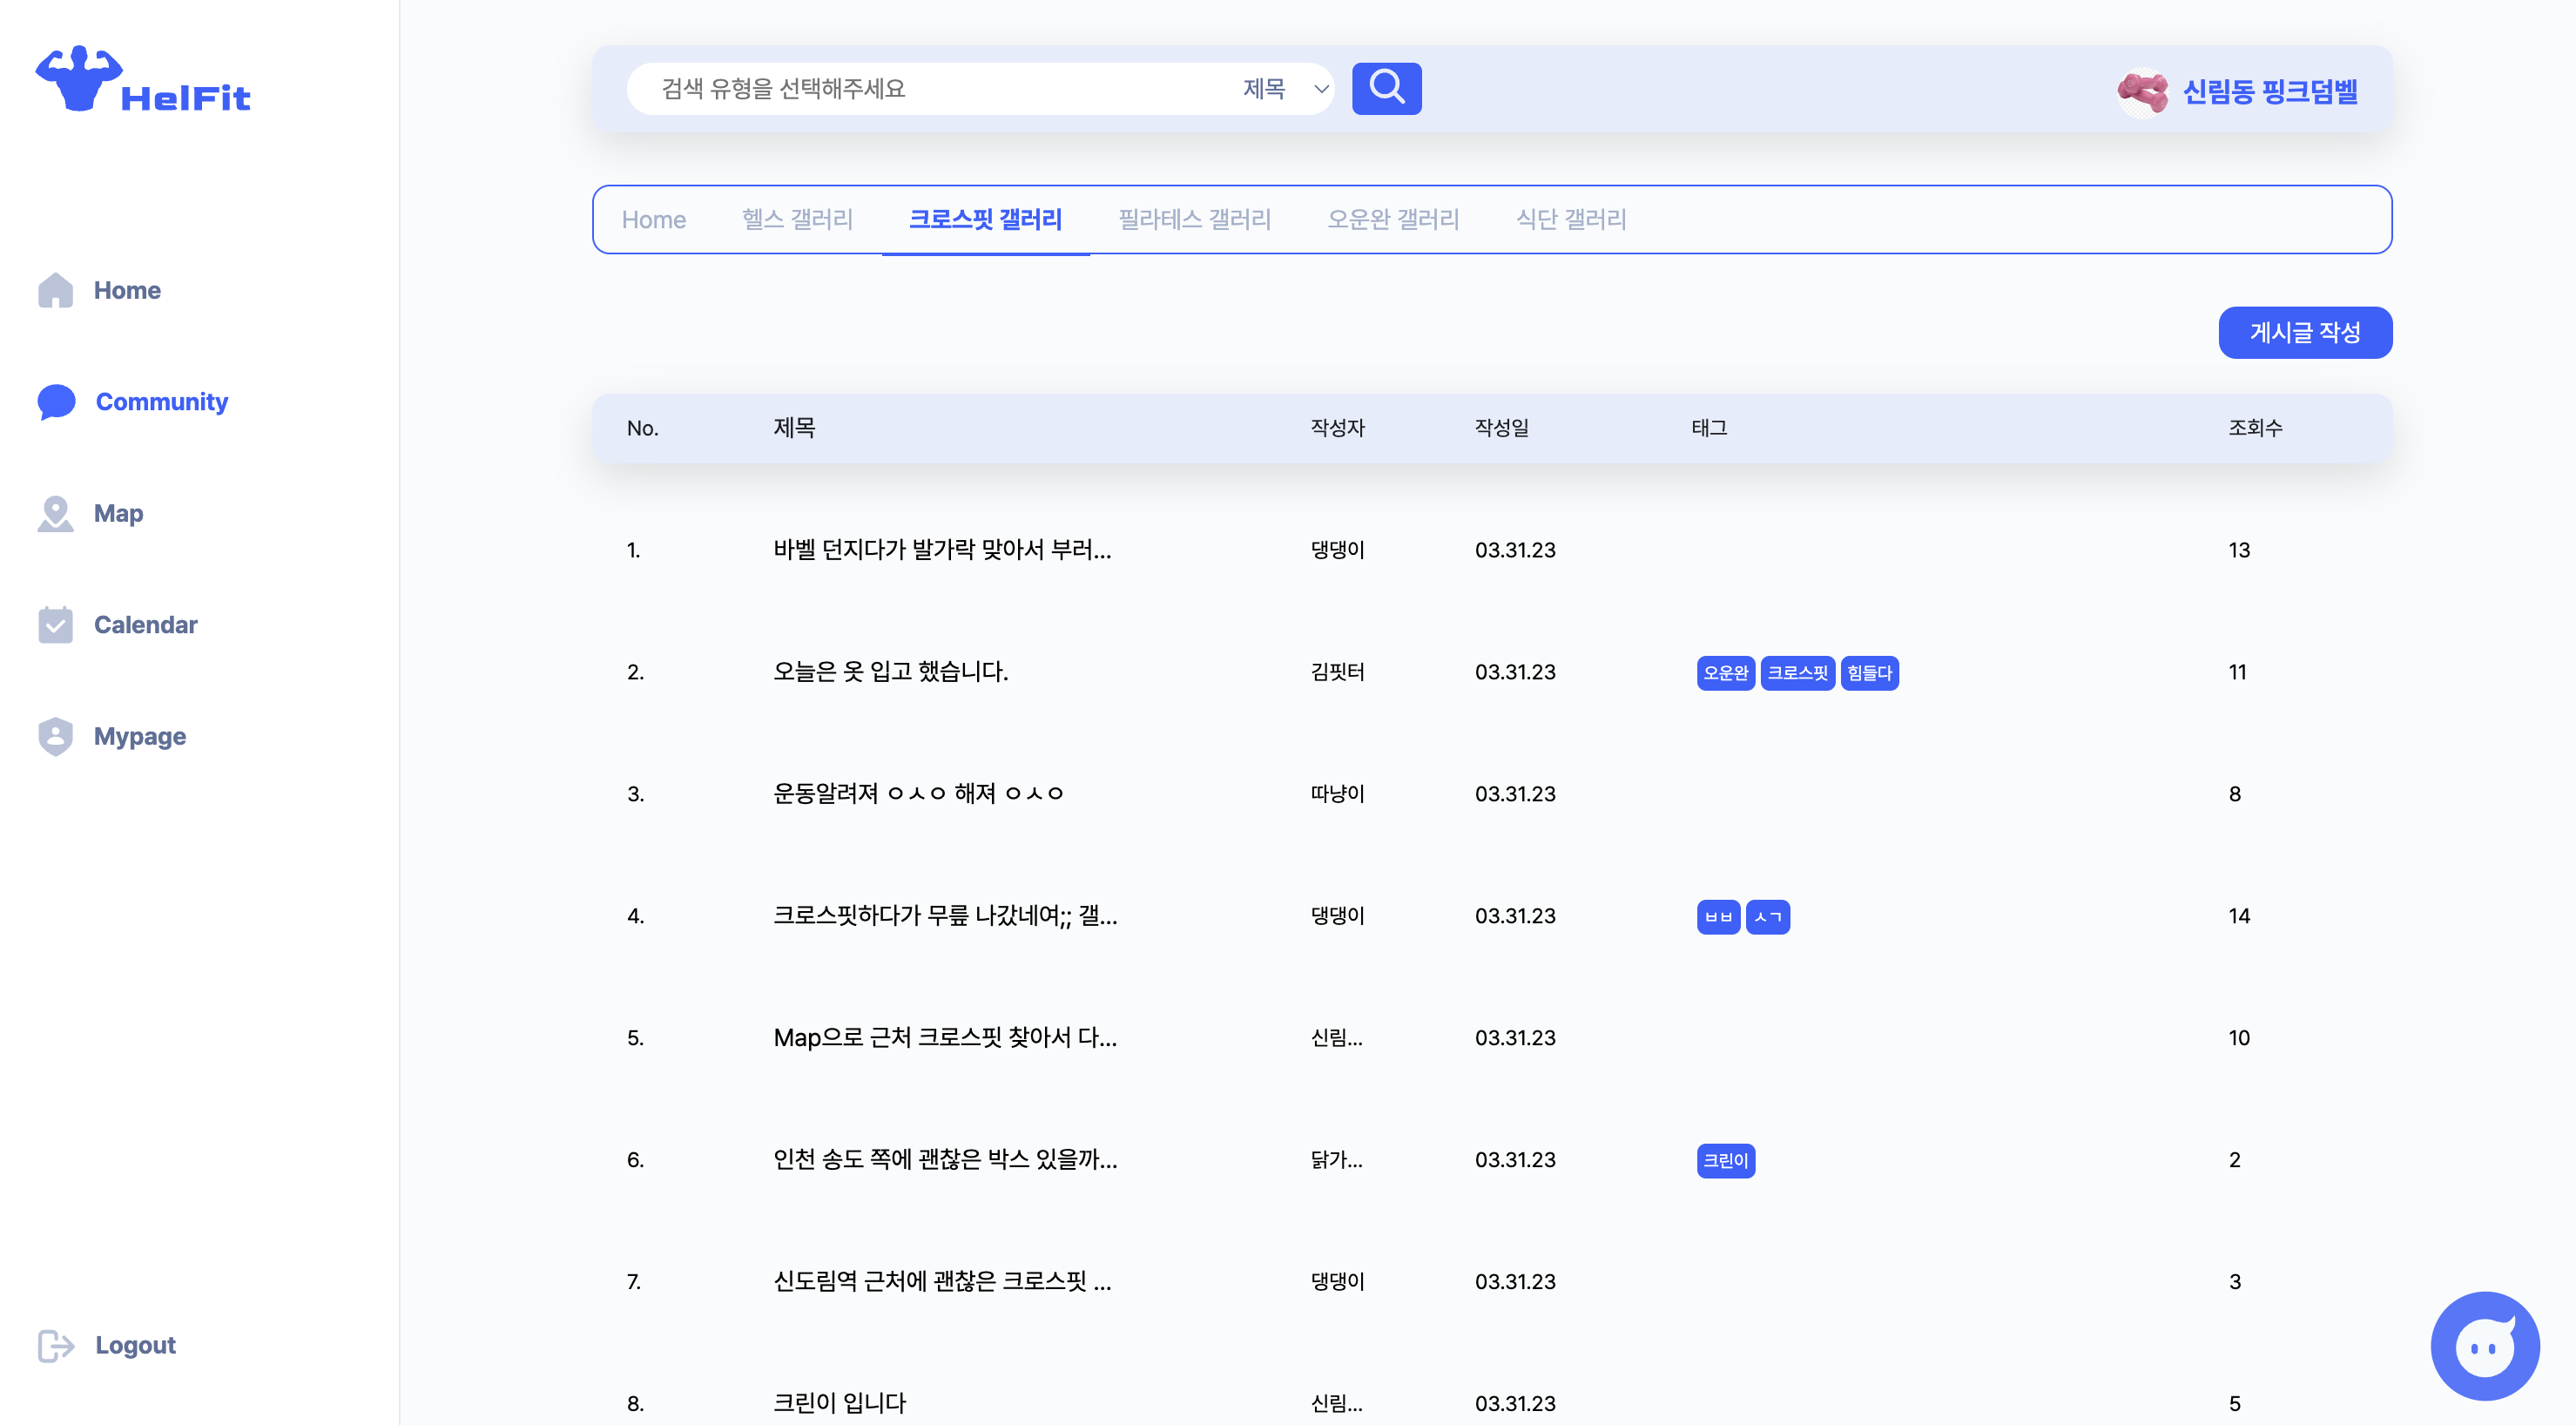
💡 게시글 조회
여기서 가장 어려웠던 점은 하나의 파일로 각 갤러리를 처리하려고 했는데 실패하고 우선 pages폴더 아래에 각 갤러리 폴더를 만들고 index와 [id] 를 별도로 생성해서 해결했다.
// 전체 코드가 아닌 나름 고생했던? 핵심? 코드들만 불러와 보면 아래와 같다.
interface Post {
  boardId: number;
  boardImageUrl: string | null;
  createdAt: string;
  modifiedAt: string;
  tags: { tagId: number; tagName: string }[];
  text: string;
  title: string;
}
type Props = {
  posts: Post[];
};
// 여기서 부터 데이터를 가져오는 코드
const HealthPost: React.FC = () => {
  const [fetchedPosts, setFetchedPosts] = useState<Post[]>([]);

  useEffect(() => {
    axios
      .get(`${URL}/api/v1/board/2?page=1`)
      .then((res) => setFetchedPosts(res.data))
      .catch((err) => console.log(err));
  }, []);

  const PostCard: React.FC<{ post: Post; order: number }> = ({ post, order }) => {
    const { title, tags, createdAt } = post;

    const createdAtString = new Date(createdAt)
      .toLocaleDateString('en-KR', {
        year: '2-digit',
        month: '2-digit',
        day: '2-digit'
      })
      .split('/')
      .join('.');

    return (
      <div>
        <li className={style.ListItem}>
          <div className={style.No}>{order}.</div>
          <div className={style.title}>{title}</div>
          <div className={style.nickName}>닉네임</div>
          <div className={style.date}>{createdAtString}</div>
          <div className={style.tag}>
            {tags.map((tag) => (
              <span className={style.tagItem}>{tag.tagName}</span>
            ))}
          </div>
          <div className={style.views}>조회수</div>
        </li>
      </div>
    );
  };
  .....
  return(
  ....
   <div className={style.ListBody}>
          <ul>
            {fetchedPosts.map((post, index) => (
              <li key={post.boardId}>
                <Link href={`/community/crossfit/${post.boardId}`}>
                  <PostCard post={post} order={index + 1} />
                </Link>
              </li>
            ))}
          </ul>
        </div>
.....
그 뒤에는 내가 이전에 짜놓았던 레이아웃에 위와같이 뿌려주었다.
🙆♂️ 작성 후 결과
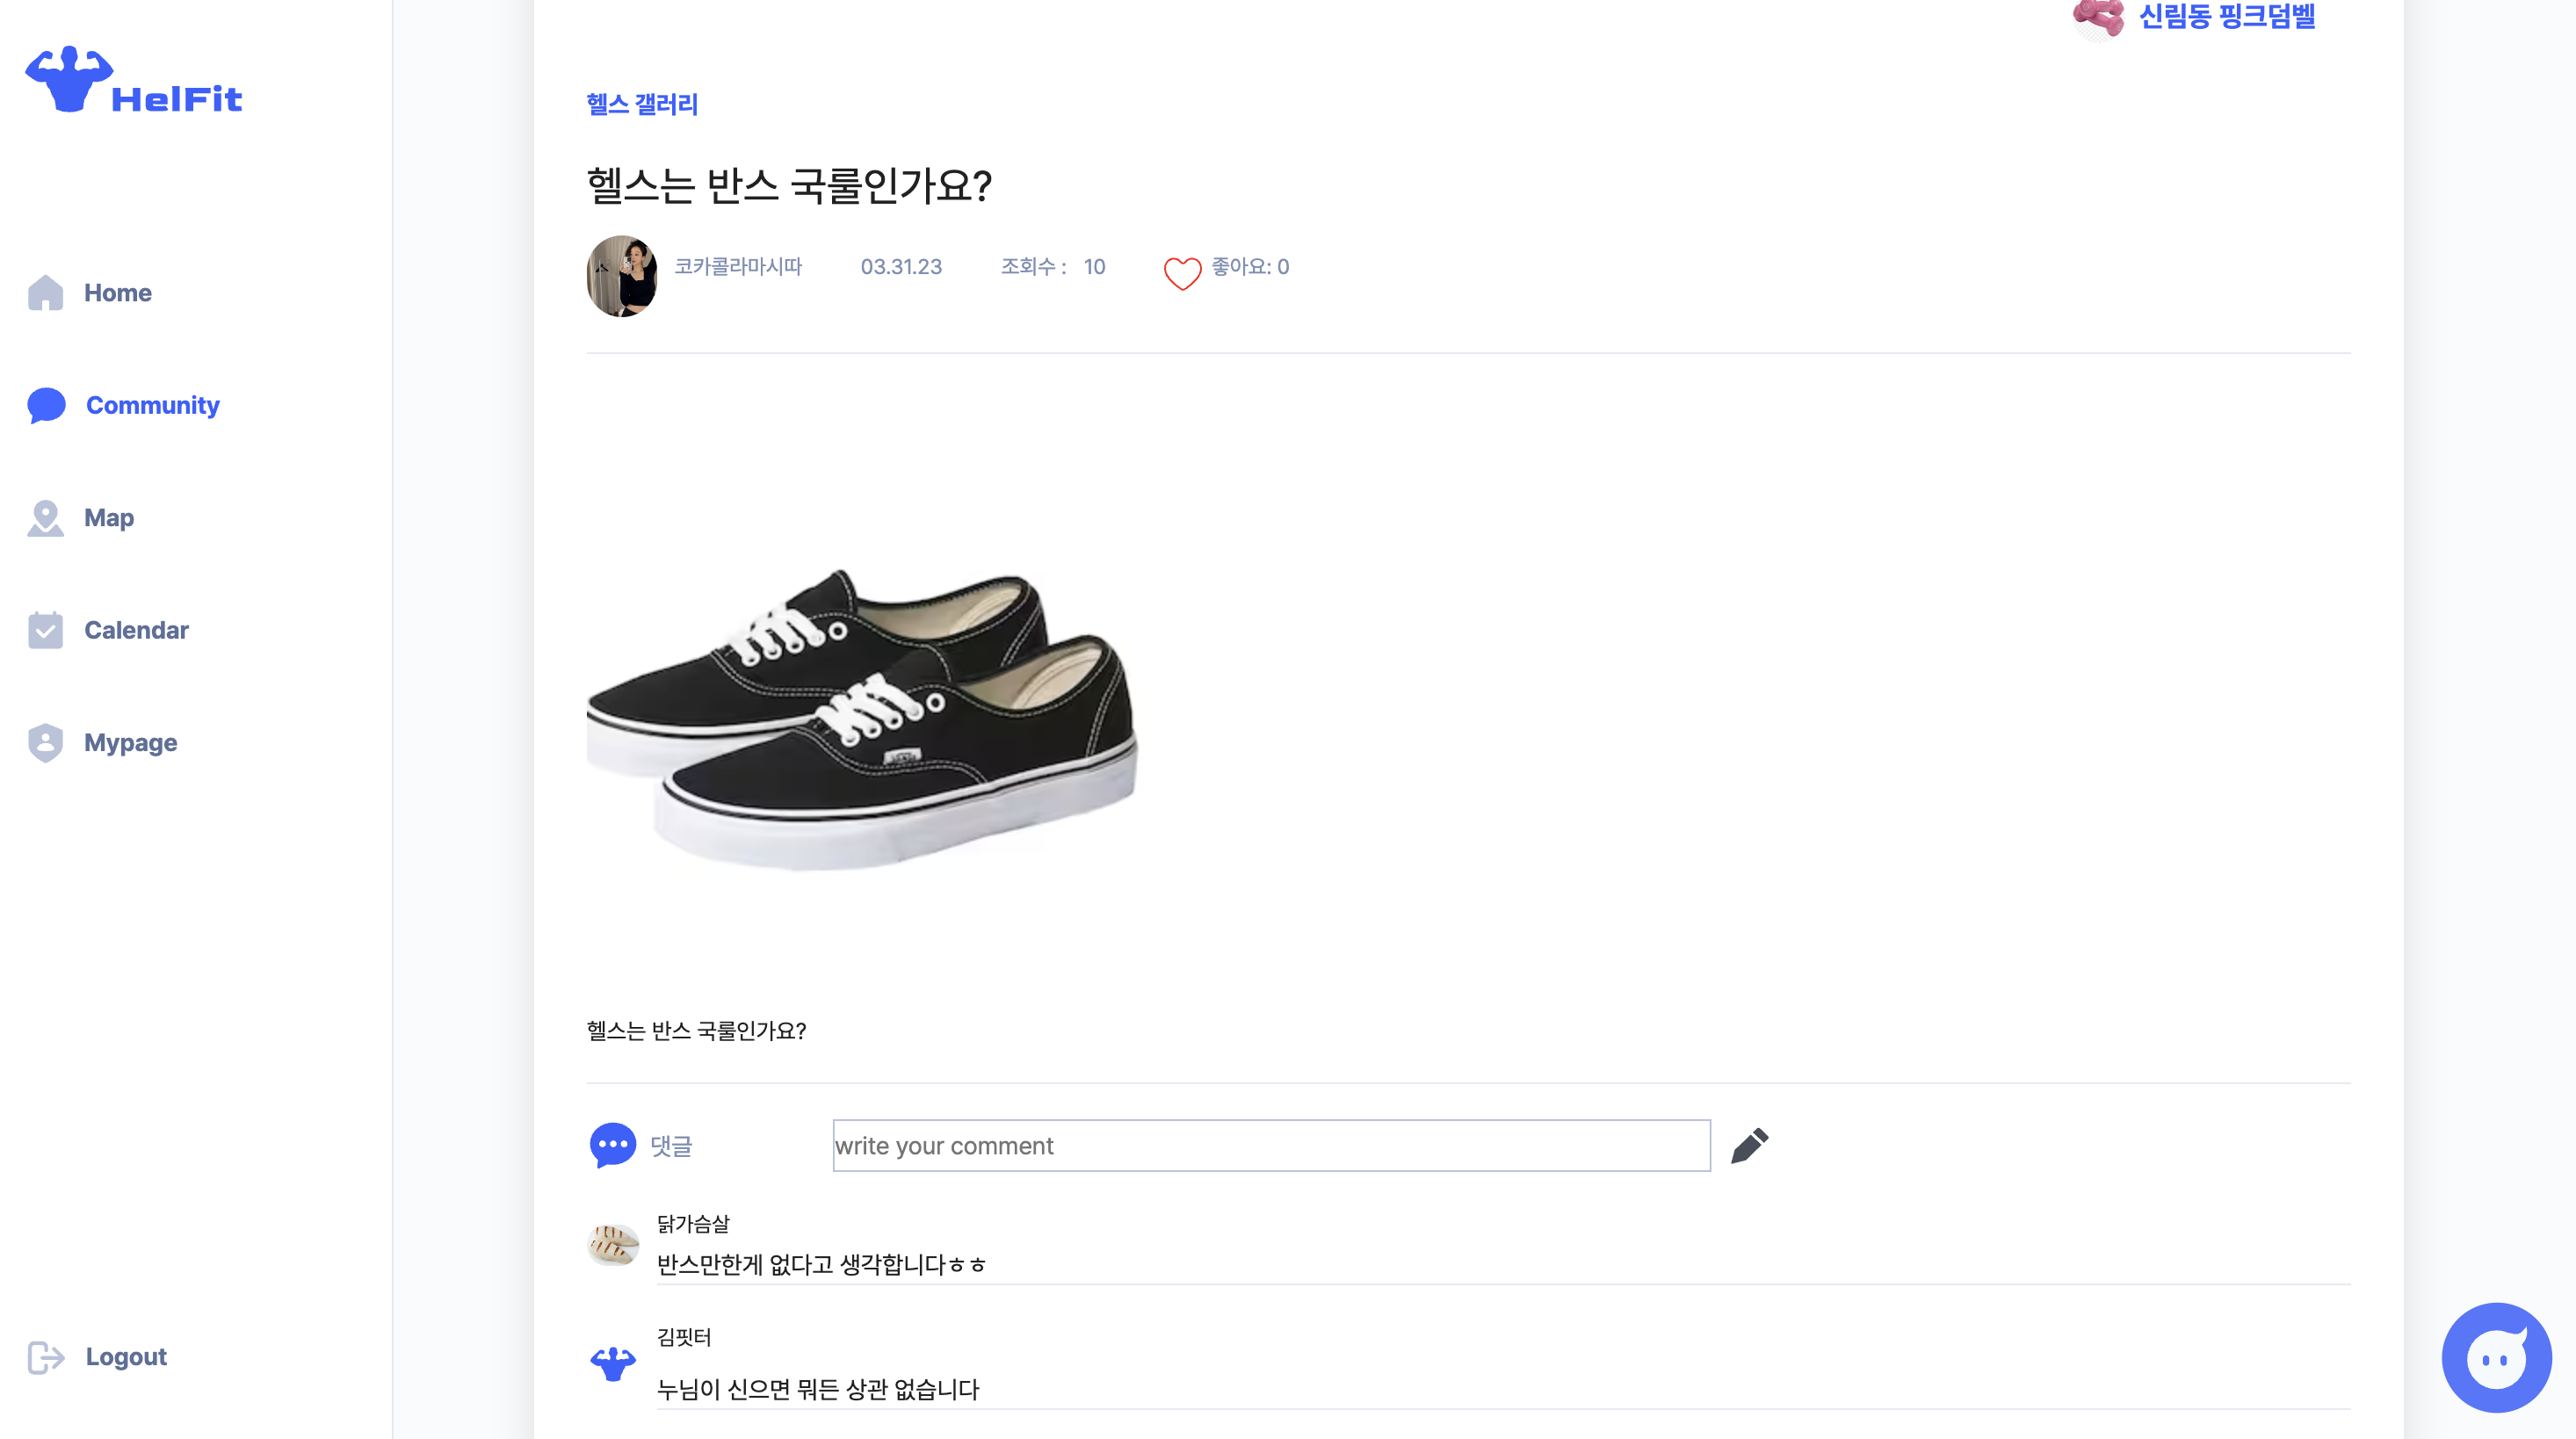
이 상세페이지는 정말 많이 골머리를 앓았다. 내용이 많을 것 같아서 다음 게시글에서 작성해보도록 하려고 한다
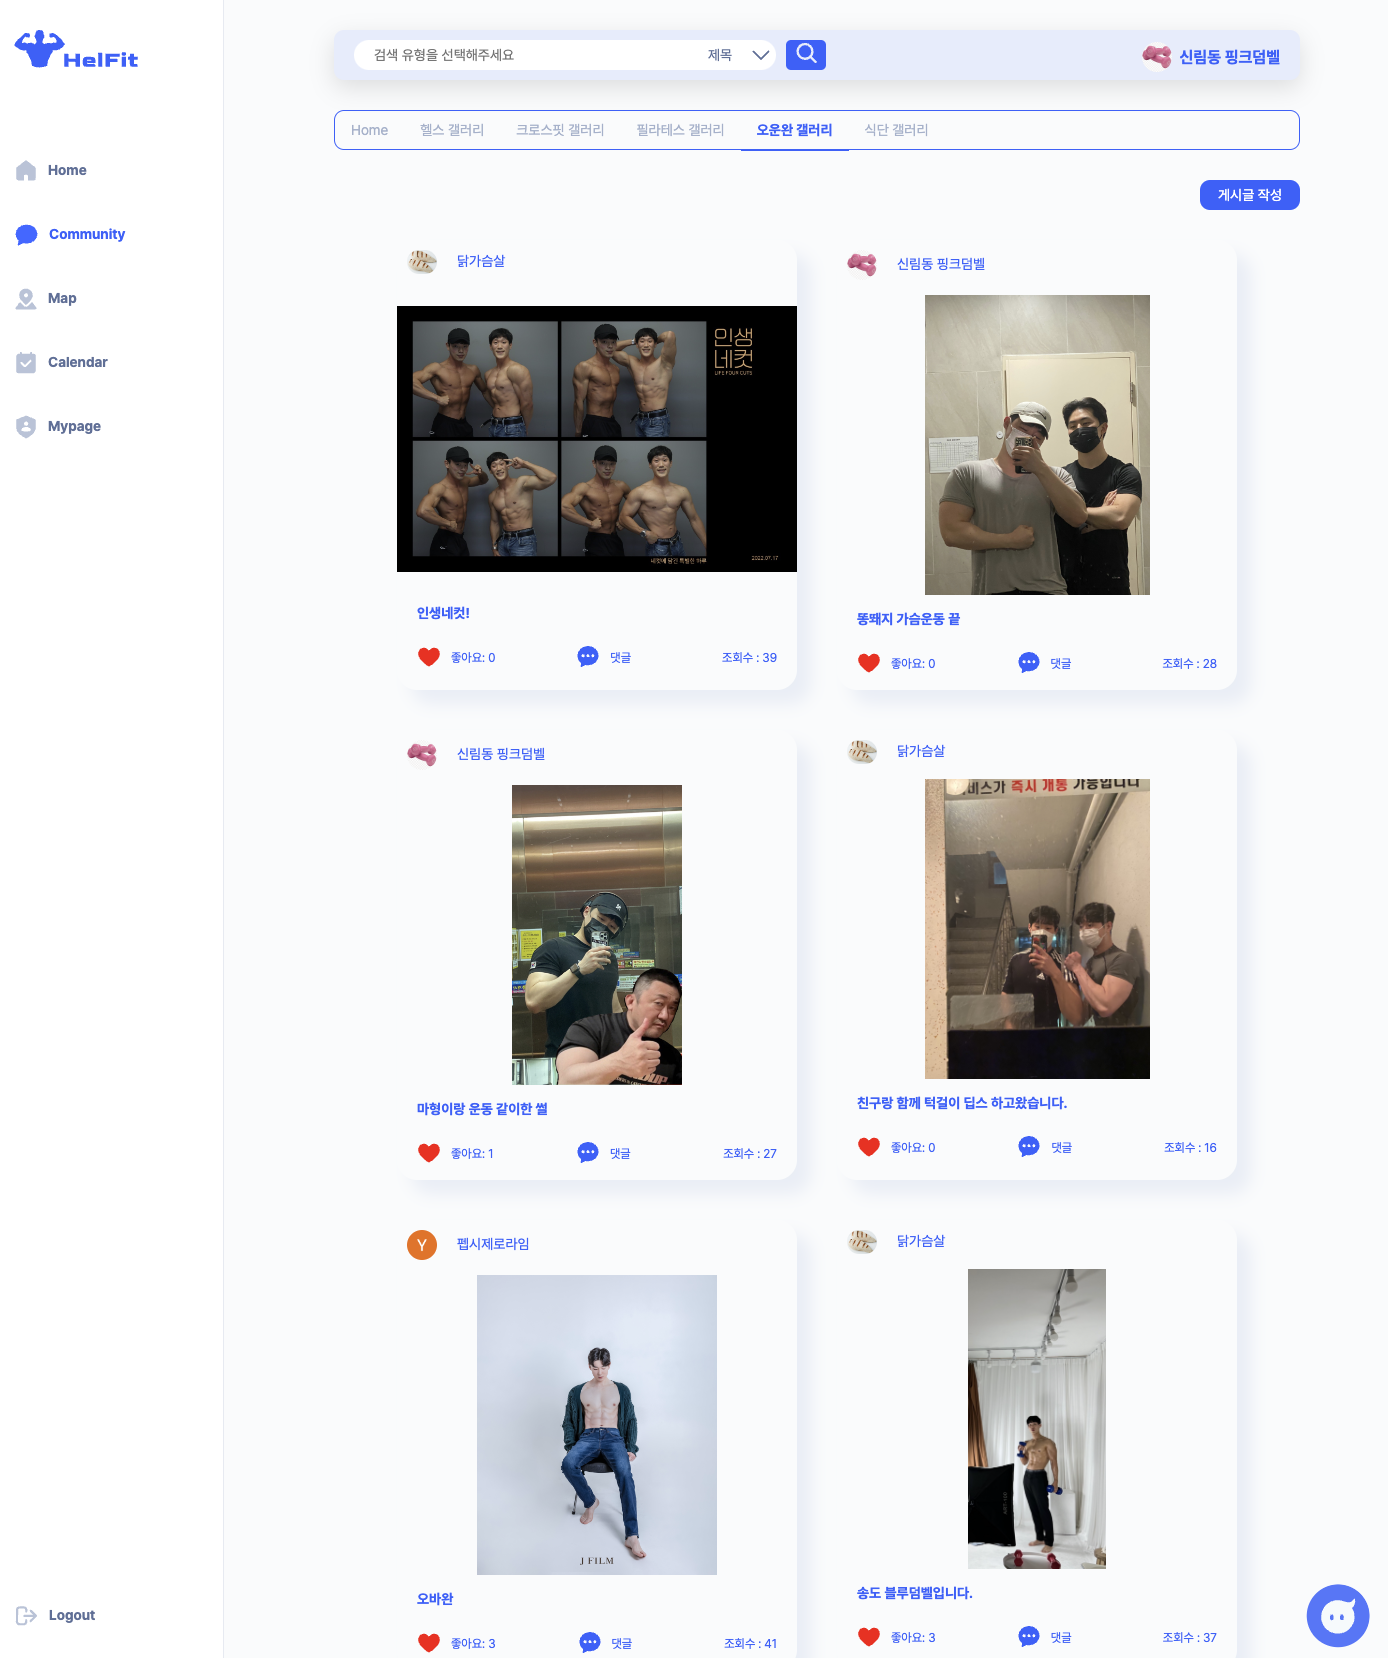
💡 SNS갤러리
게시글 조회는 두가지 파트로 나누었다. 기능적으로는 크게 다르지 않지만 갑작스러운 아이디어로 오운완갤러리나 식단갤러리는 SNS느낌을 내고 싶었고 그래서 사진을 필수로 입력받고 싶었다.
👨🏻💻 하면서 가장 고생했던 점
정말 단언컨대 React quill의 사용이였다.
게시글을 post 하게 되면 게시글에 계속 &nspb 이런식으로 내용 앞 뒤로 <p>태그가 붙어서 온다.
( 3. 29일 문제 해결 및 내용 post )
분명 post요청을 보낼 때는 정상적으로 보내지는데 이게 서버로 들어가게 되면 위와 같이 읽혀져서 get요청시 그대로 출력되는 것 같았다. 다양한 해결 방법을 찾아보았고 이것 저것 많이 해봤지만 내가 선택한 방법은 두가지였다.
- dangerouslySetInnerHTML
				<div className={style.Content_Text}>
            <div
              className='ql-editor'
              dangerouslySetInnerHTML=
            />
          </div>
사실 이 방법은 그다지 좋은 방법은 아니다. dangerouslySetInnerHTML은 브라우저 DOM에서 innerHTML을 사용하기 위한 React의 대체 방법이다. 일반적으로 코드에서 HTML을 설정하는 것은 사이트 간 스크립팅 공격에 쉽게 노출될 수 있기 때문에 위험하다. 따라서 React에서 직접 HTML을 설정할 수는 있지만, 위험하다는 것을 상기시키기 위해 dangerouslySetInnerHTML을 작성하고 __html 키로 객체를 전달해야 한다.
이 방법을 사용한다고 해도 100프로 해결되는게 아니였다. 다만 &nspb 이렇게 나오던 말들이 <p> 안녕하세요 </p> 이렇게 출력될 뿐이였다.
아래의 방법까지 사용해서 p태그까지 없앨 수 있었다.
- 직접 자르기
const escapeMap = {
'<': '<',
'〈': '<',
'>': '>',
'〉': '>',
'&': '&',
'"': '"',
''': "'"
};
const pattern = /&(lt|gt|amp|quot|#x27|#12296|#12297);/g;
const convertToHtml = (text) =>
text.replace(pattern, (match, entity) => escapeMap[`&${entity};`] || match);
useEffect(() => {
const localUserId = JSON.parse(localStorage.UserInfo?.userId ?? 'null');
axios
.get(`${URL}/api/v1/board/${pageNumber}/${boardID}`)
.then((res) => {
const data = res.data;
res.data.text = convertToHtml(res.data.text);
setFetchedData(data);
...
이 방법은 같은 팀원이였던 지원님께서 추천해주신 방식으로 1번과 2번 방법을 모두 사용해서 해결했던 것 같다.
Comments